Welcome to a Watercolor Tutorial!
Watercolors are one of my favorite kinds of art supplies. I enjoy watercolors because I find I like to make multiple layers to get the exact shade I want. I also like working from light to dark which is really easy with watercolors. Watercolors are flexible and there are many fun techniques to use with them.
Watercolors require some basic supplies. Some are required while others are up to personal preference.
Watercolor Supplies
- Watercolors – You can use really any brand or type. They can come in pans or in tubes. Here is some more information!
- Watercolor Paper – Watercolors work best on watercolor paper. You can get away with using subpar watercolors on good paper but not really the other way around. Here is some more information!
- Watercolor Brushes – Honestly you just need a few good brushes for a few different things. When working on a piece I tend to have 2 to 5 on hand. Here is some more information!
- Palette – If you use watercolor tubes this is required. Watercolor pans sometimes provide a palette, usually as part of the lid but you can also use them straight from the pan.
- Water – I personally have two cups of water. One is kept clean, so I don’t muddy up my watercolors or washes, and the other is used for cleaning. You can get away with using one you will just need to switch it out once in a while.
- Something to Clean Your Brush – I use paper towels since they are easy and disposable. You can also use a sponge or a towel.
- Masking Fluid – Not required and they can be a bit finicky. Always test before using on a piece. Some people also use liquid latex. You can sometimes get away with using masking tape but sometimes water will slip under the tape. You can also try using a white crayon since the water won’t slip under that but it can’t be easily removed unlike tape or masking fluid.
- Tape – Depending on the type of watercolor paper you have or how much water you plan on using you may need to tape down your piece before working on it. There are many types of tape for a person to use but personally I use masking tape.
Techniques and Their Use
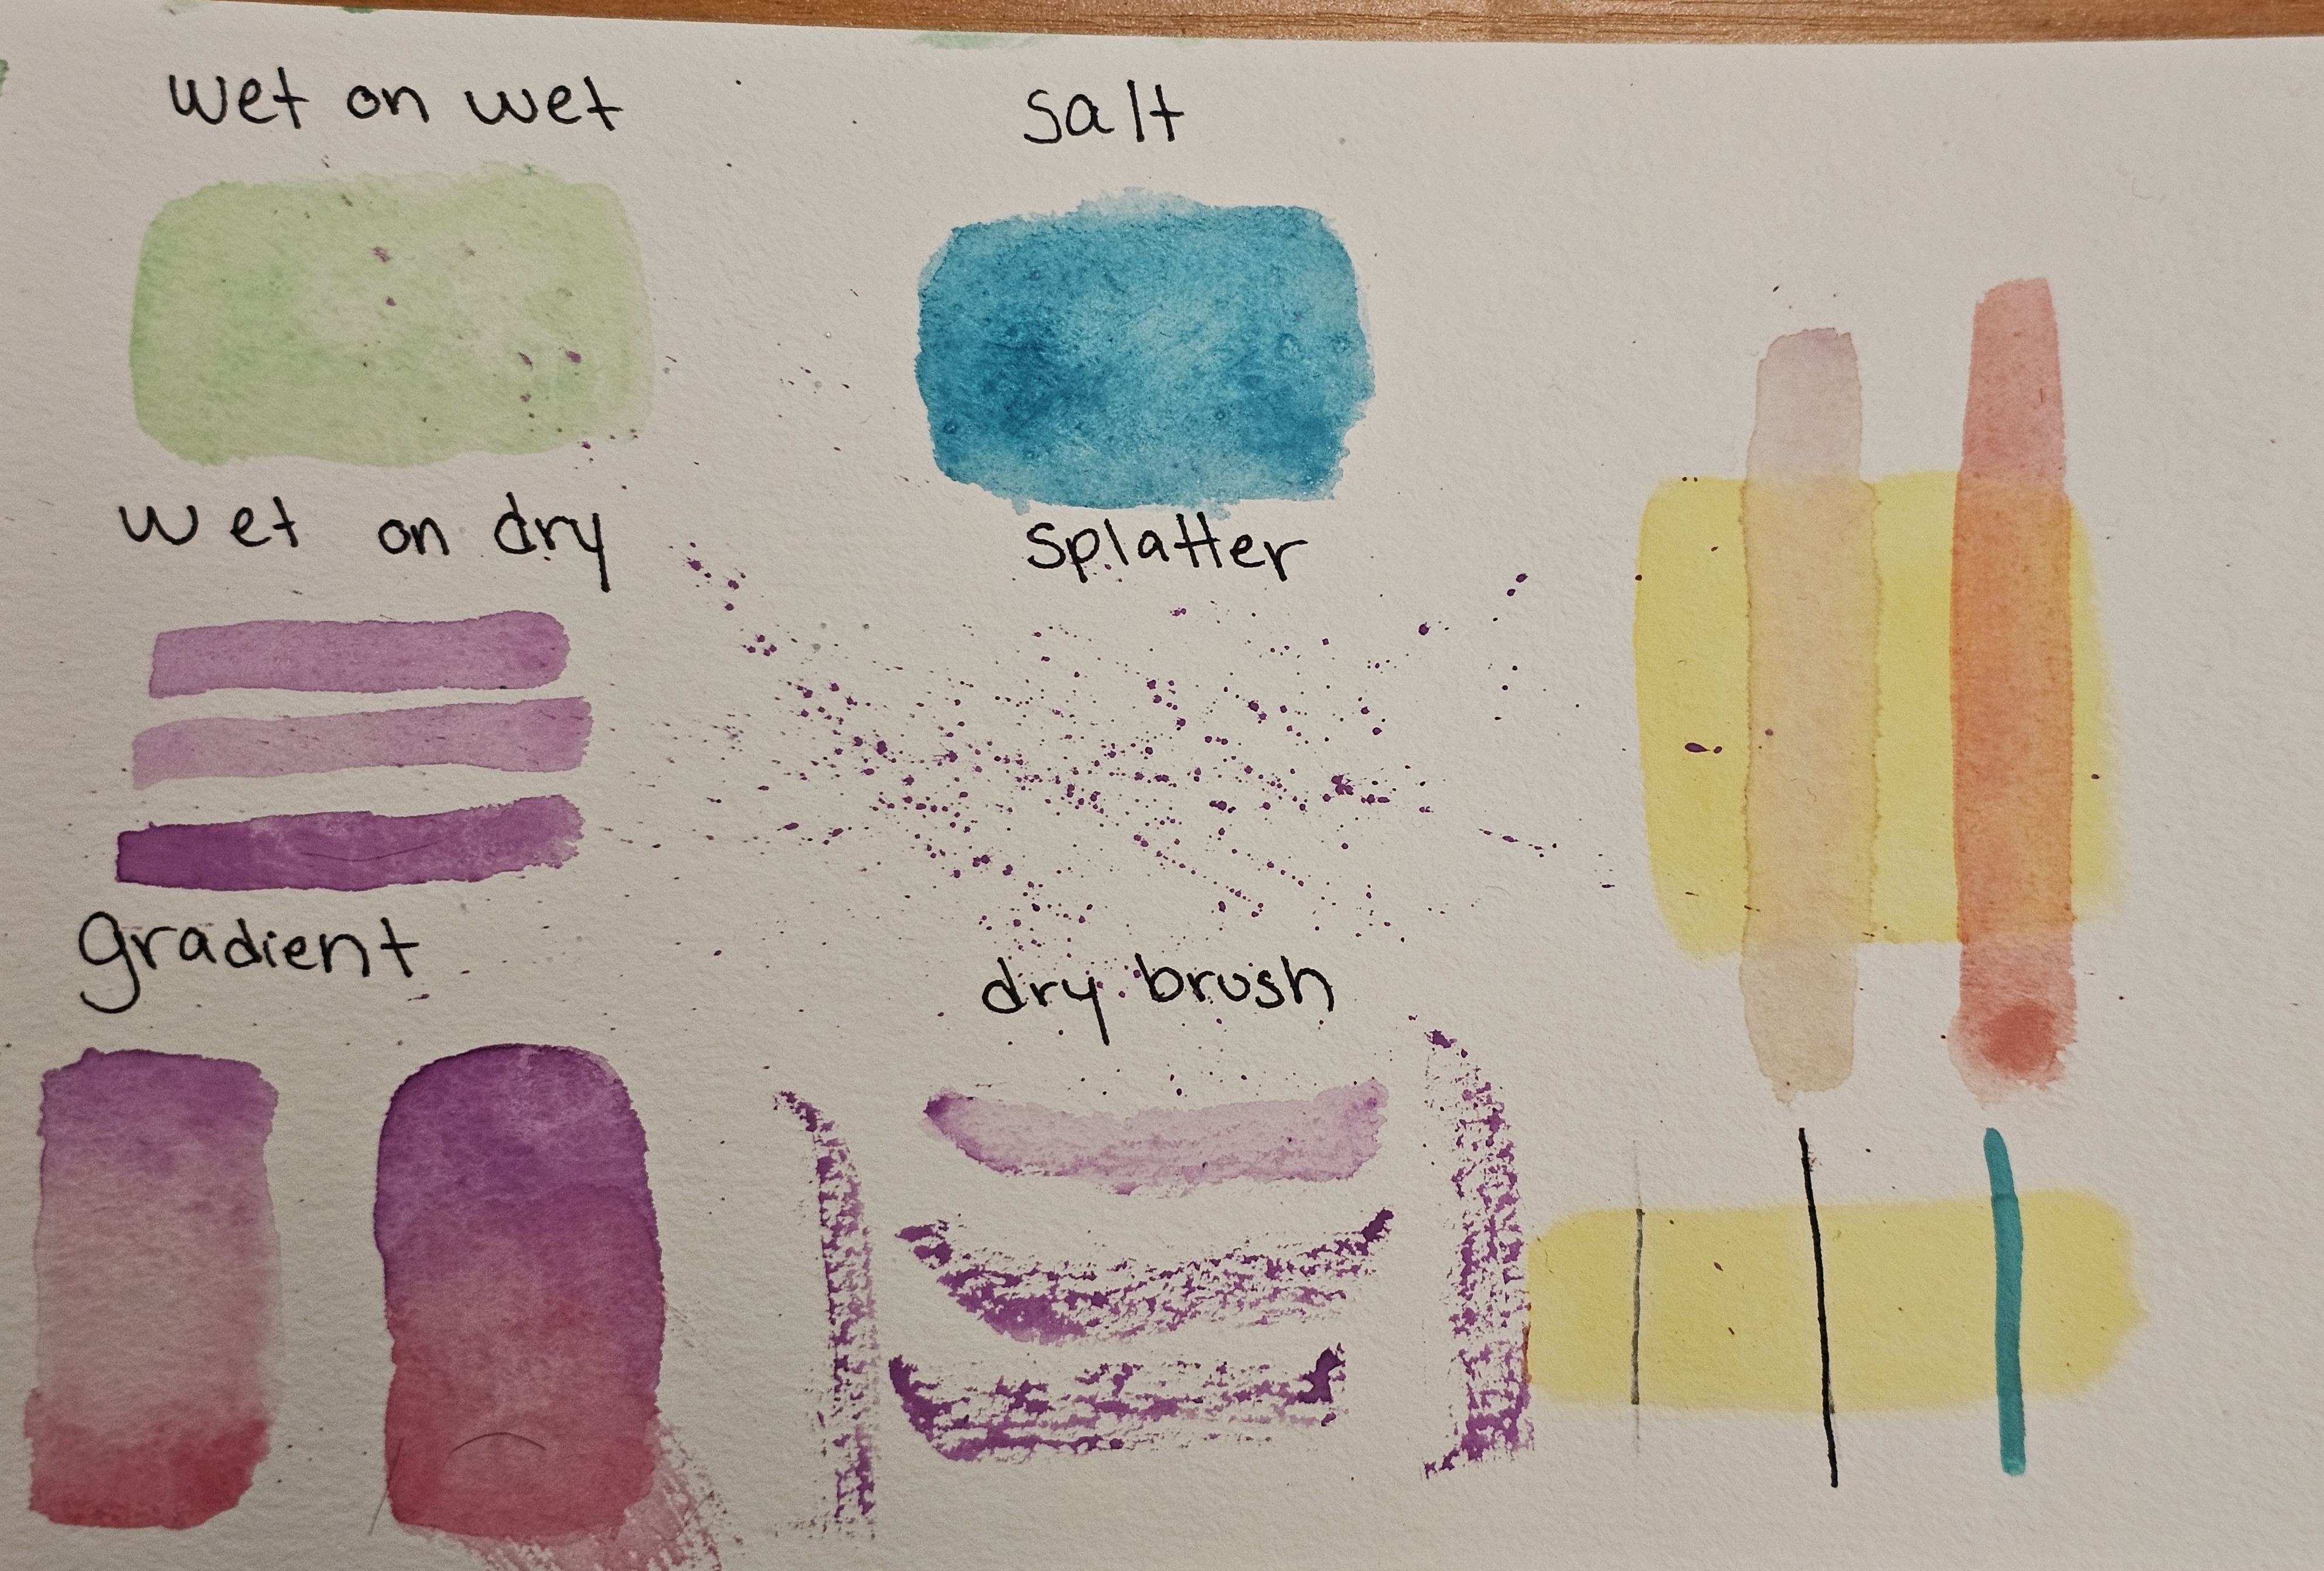
The Wet on Wet technique is accomplished by first putting down water on your paper followed by using your brush to add watercolor on top. This technique can be used to make flat washes across large areas and creating gradients. It also works well for marking out white space with the water first, so you won’t accidentally cover it up.
The Wet on Dry technique is just using a wet paintbrush on dry paper. This can create sharper edges to your strokes. I also find it useful for making flat washes in smaller areas. If you find making a flat wash difficult with Wet on Wet try using Wet on Dry instead.
Gradients are made by combing two different colors over a distance. You can accomplish this by watering down a color the further away from the most pigmented part. In the image, I had purple be most pigmented at the top and watered it down so it mixed and transitioned to red.
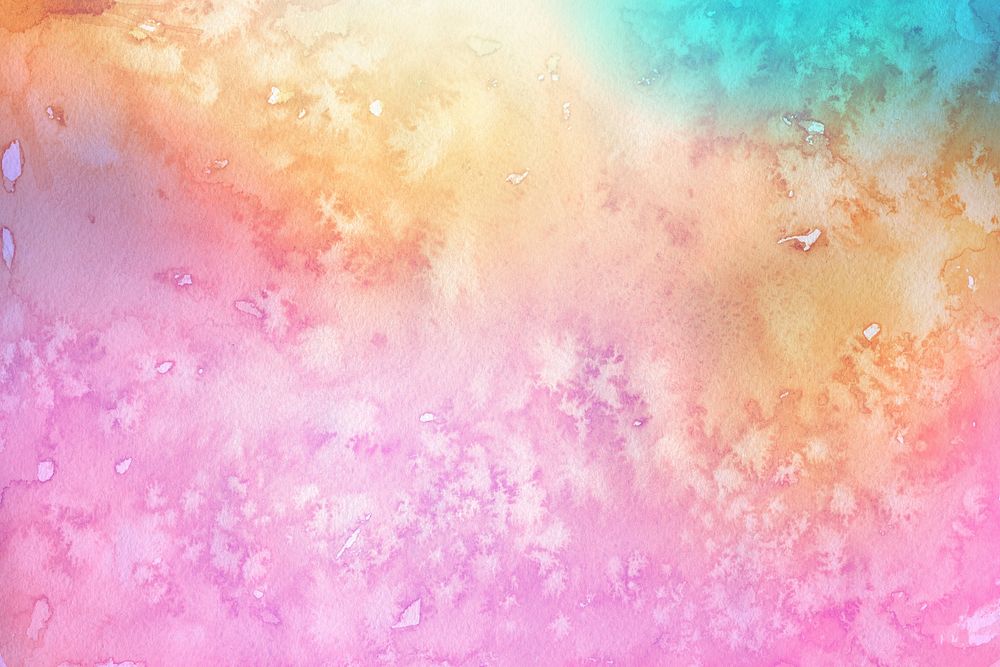
"Free ombre watercolor texture image" is marked with CC0 1.0.
Mixing Salt with watercolors can create a fun texture. To properly use this you want to layout the wash you want to use the salt on. While it is still wet sprinkle salt on the area you want. Let it dry fully without disturbing for the full effect. Here is some more information!
Creating a Splatter effect is really easy with watercolors. You load up the brush and then either shake or tap it to create a splatter. It can be unpredictable and creates a nice effect.
Dry Brushing is accomplished by loading a paint brush with pigment and lightly dragging across the paper, allowing the texture of the watercolor paper to show.
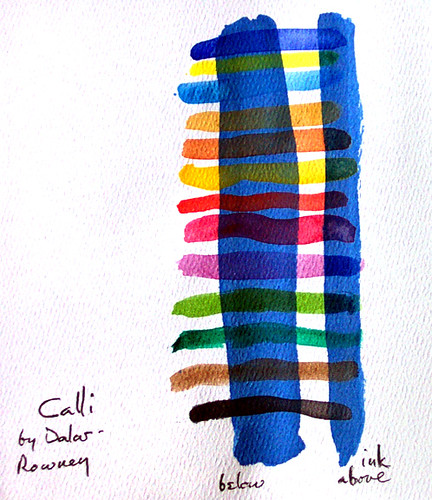
"Watercolor Class experiments - blue! ink" by RuTemple is licensed under CC BY 2.0.
Glazing is just simply layering washes over dry washes. You can create nice colors by doing this as you can see in my image at the top of the techniques section. You can also create a similar effect by dong the same with inks. Look at the image above.
Be careful. If you use anything underneath the watercolors you will be unable to remove it after applying watercolor on top. You can use inks, pens, or paint on top of the watercolor to create lines or to block out a shape.
Anything else?
This isn’t a full complete explanation for everything to do with watercolor, moreso an intro. Please look into watercolor artists and support their work. Here is a link to Danica Sills Watercolor Tutorials playlist on Youtube. She is one of my favorite artists and I really enjoy her work. I watched several of her tutorials and thought they were good.
Thank you for reading and I hope you enjoy creating art!
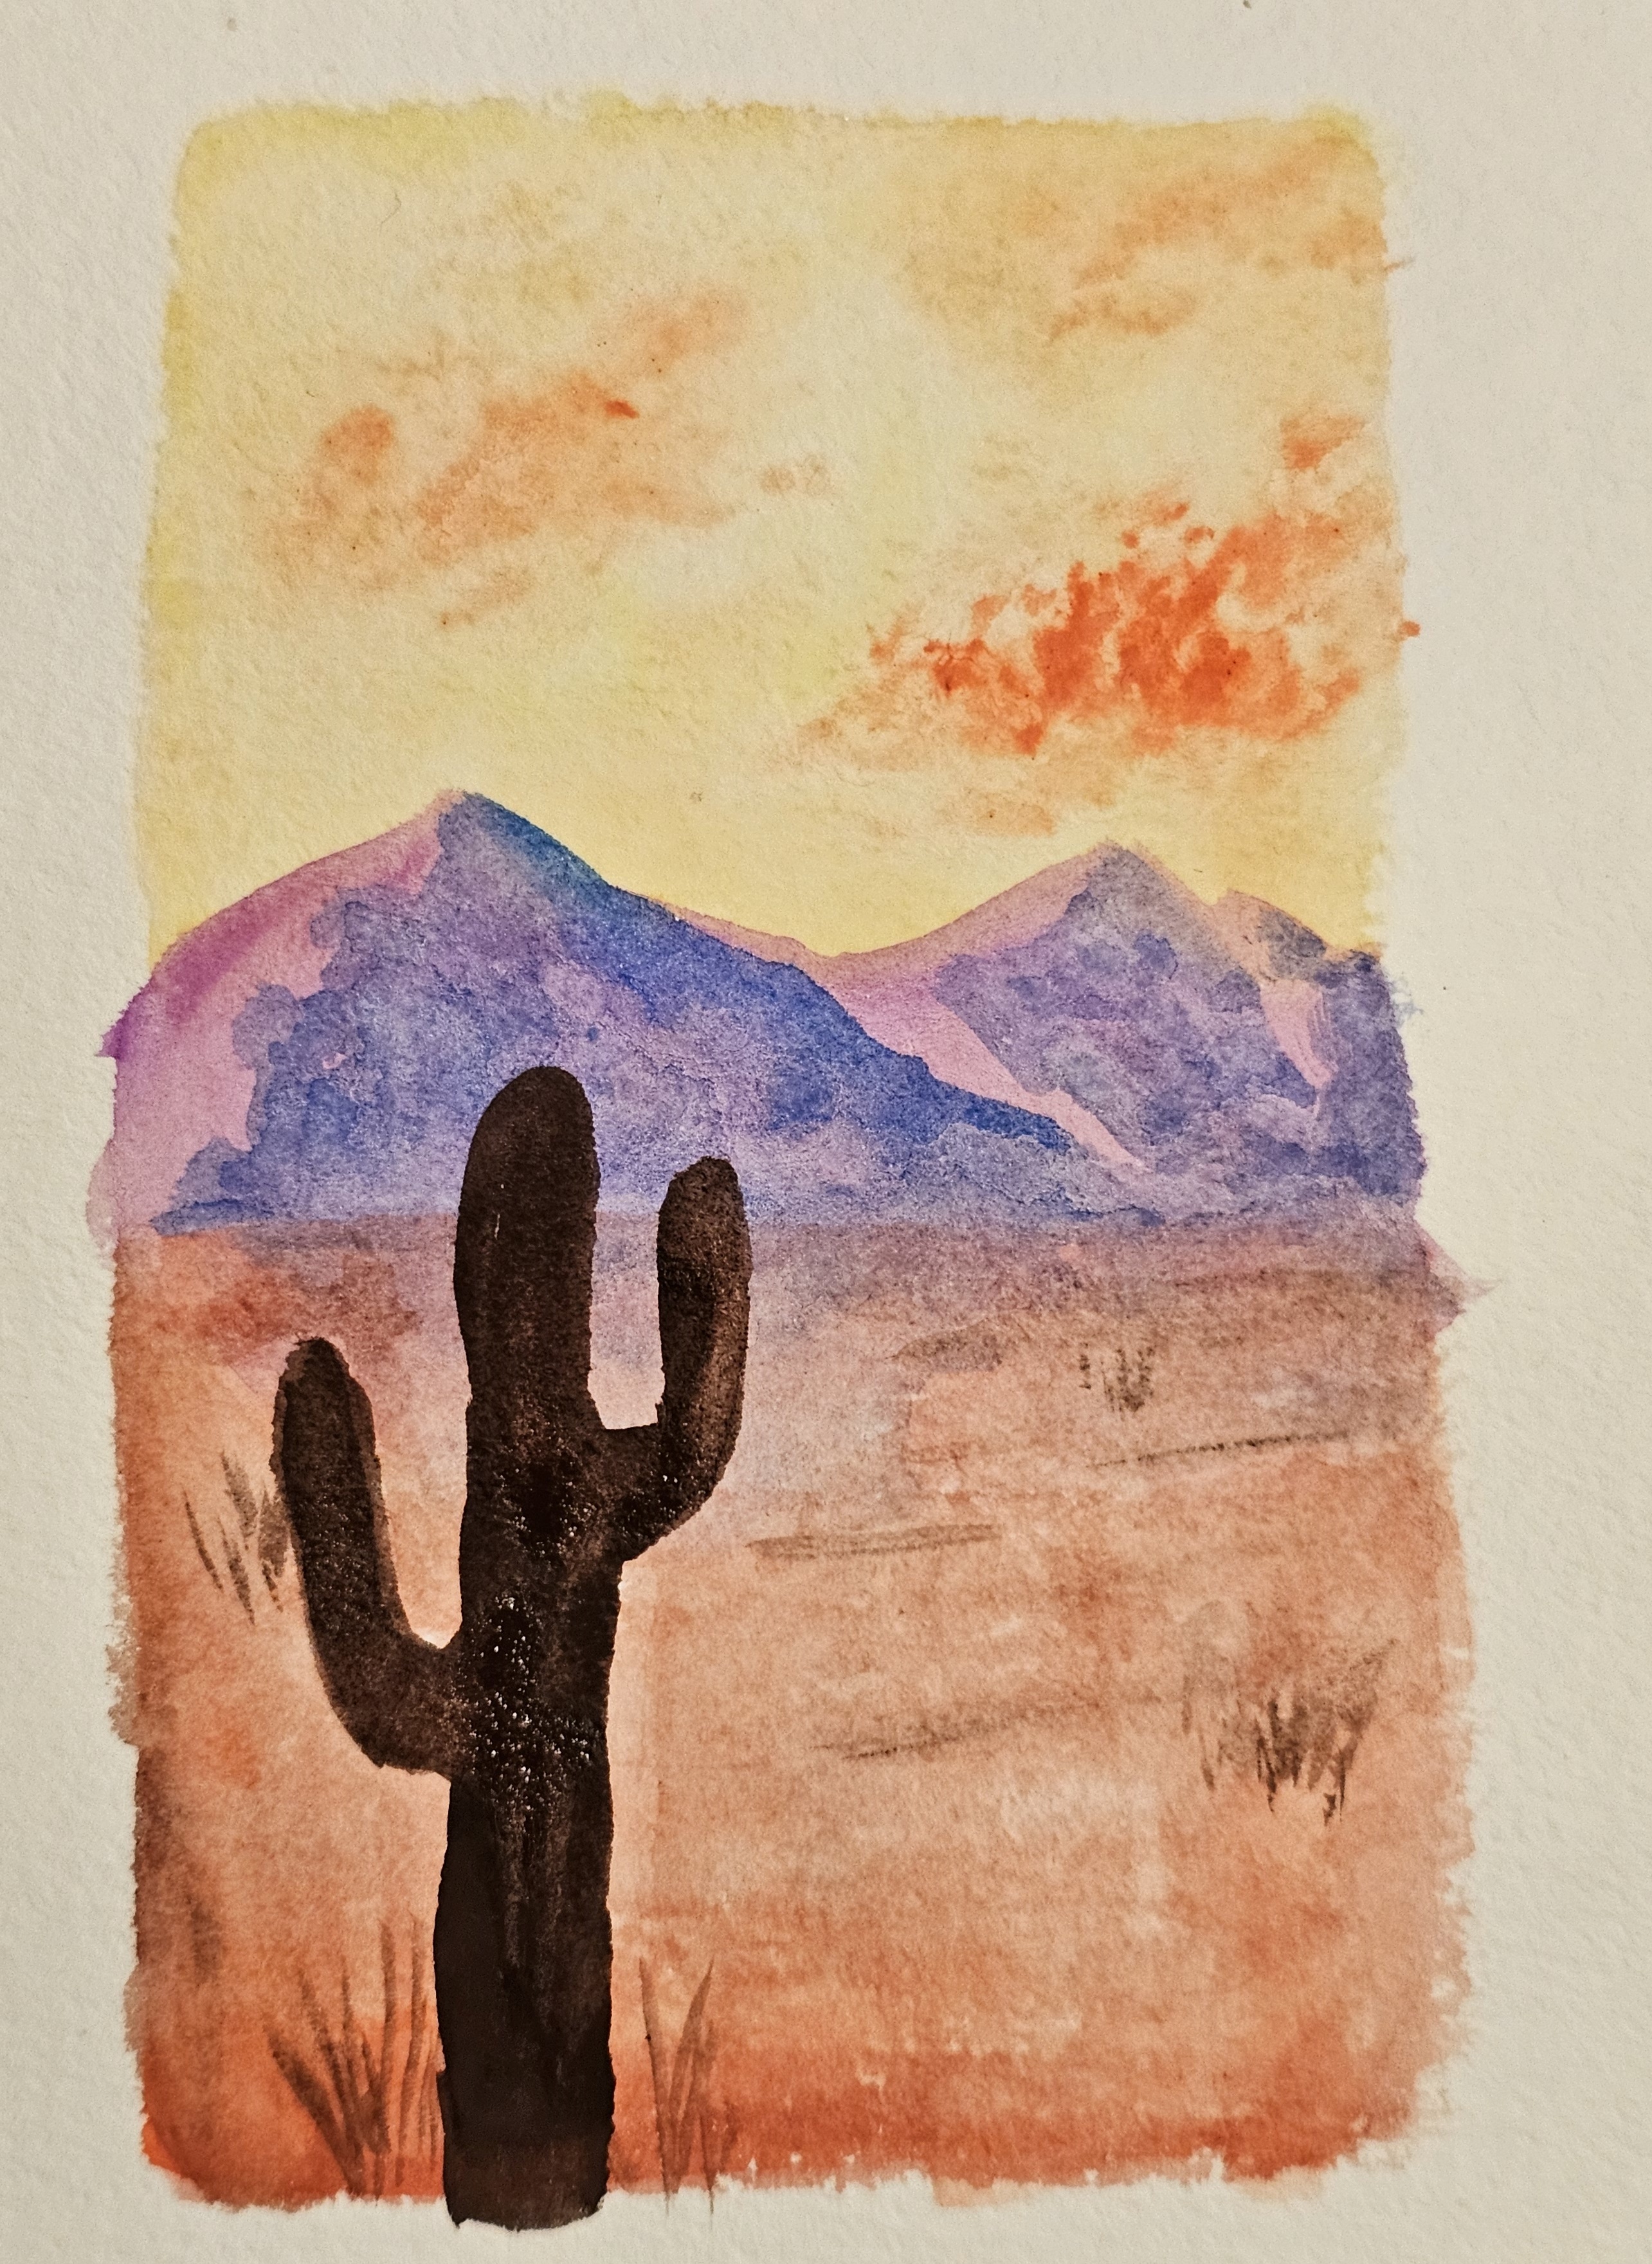
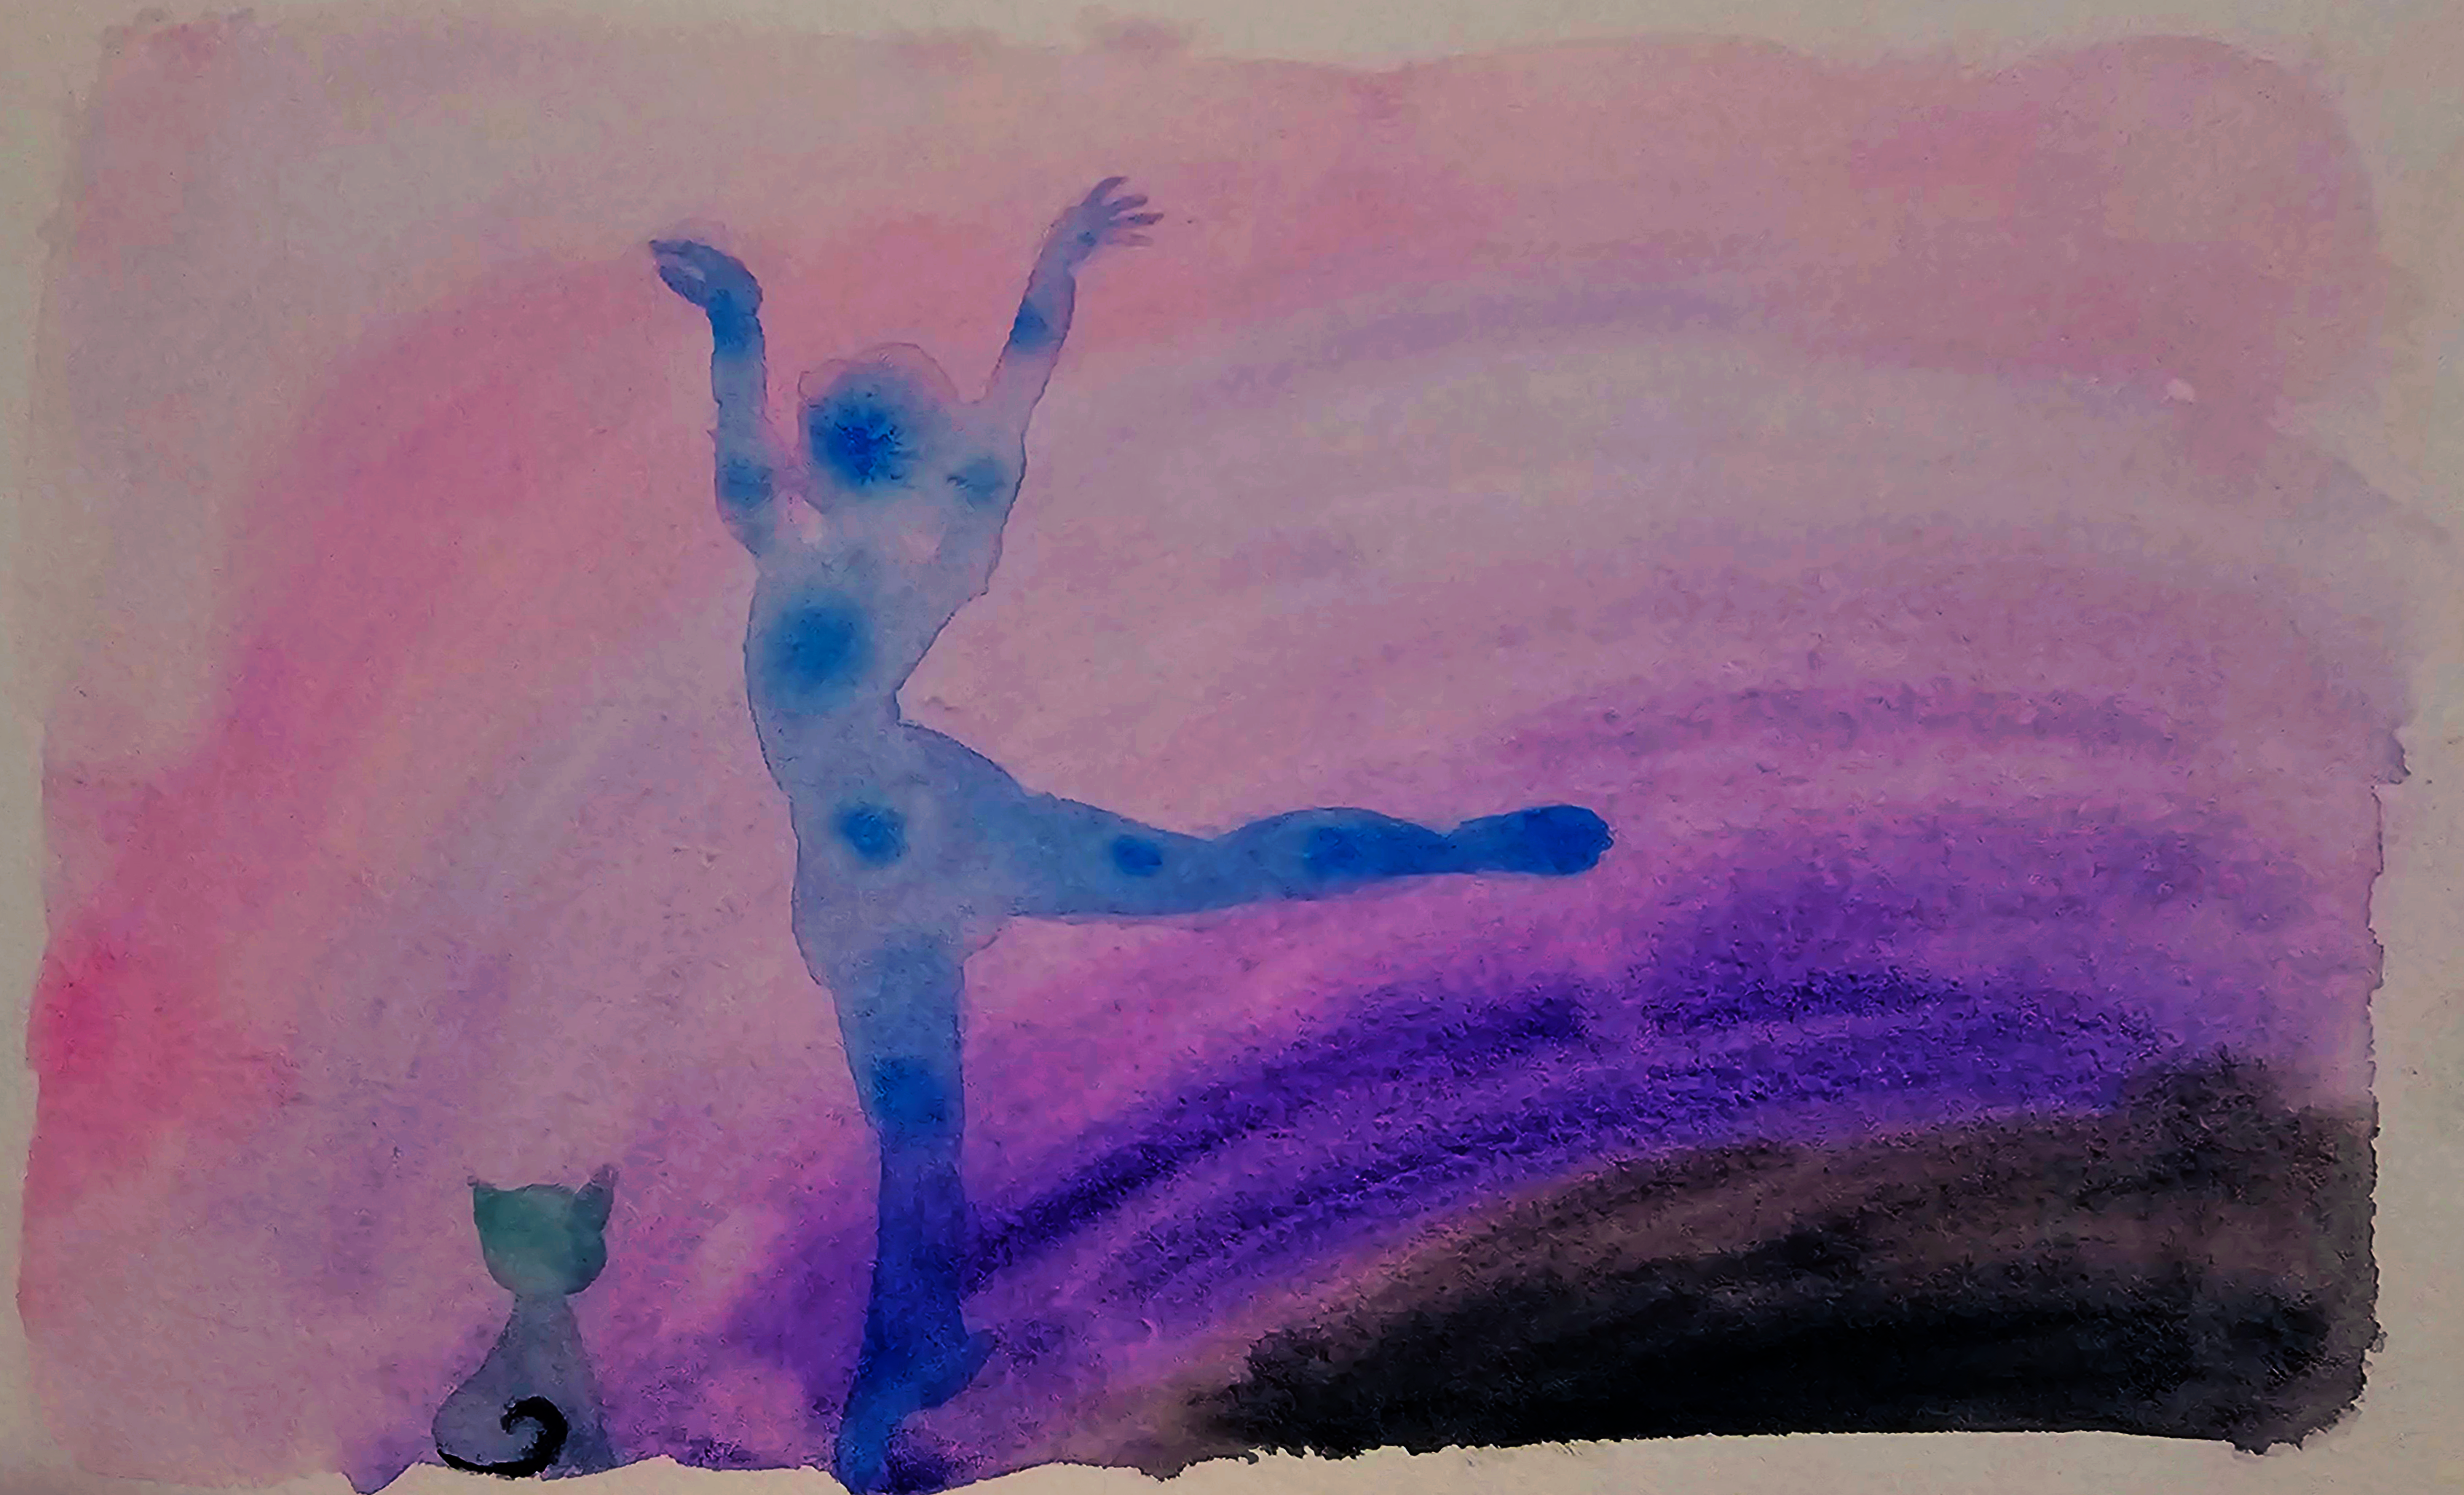
My Watercolor Art!